



New Port Richey Tubular Skylight Installation
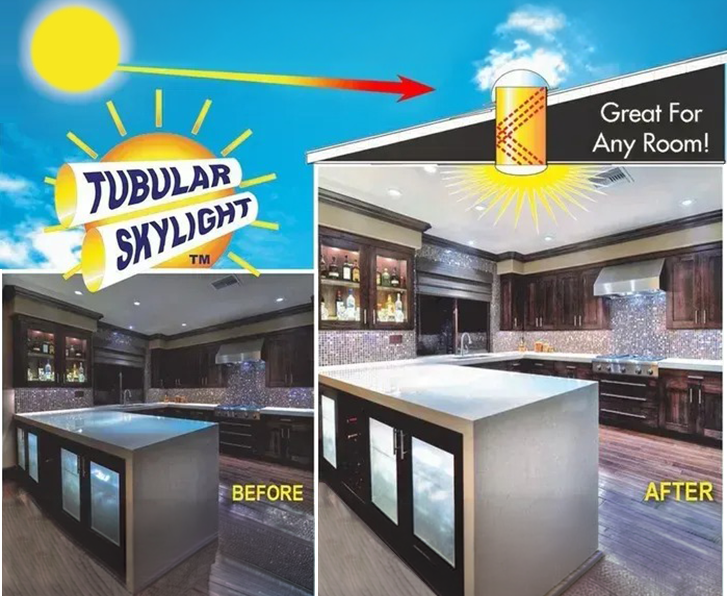
A well-installed solar tube changes how a home feels in the middle of the day. The goal isn't "a little more light." Done right, tubular skylight installation in New Port Richey brings bright, even daylight into rooms that normally stay dim, without creating roof leaks, drafts, or ugly ceiling patches. You get a clean ceiling diffuser, a watertight flashing system on the roof, and a reflective tube path that's planned around your attic so the light output stays strong.
Tubular skylights work especially well here because New Port Richey has plenty of sun, and many homes have interior spaces that don't share an exterior wall. A solar tube lets you pull daylight through the roof into hallways, closets, laundry rooms, bathrooms, kitchens, and other "center of the home" zones where a traditional window isn't an option.
What "done right" looks like for a solar tube in a Florida roof
A tubular skylight is a compact daylighting system: a clear roof lens captures sunlight, a highly reflective tube carries it through the attic, and a ceiling diffuser spreads it into the room. The installer's job is to make that system behave like it belongs on your roof for the long haul.
In New Port Richey, "done right" starts with water management. Summer downpours and wind-driven rain punish weak flashing details. A proper install matches the flashing to your roof type and pitch, integrates it with the roofing materials the way it's designed to, and seals every fastener and joint where the system requires it. The roof opening also needs clean edges and correct underlayment handling so the roof still sheds water the way it should.
"Done right" also means good light delivery. If the tube is kinked, overly long, or routed around obstacles as an afterthought, brightness drops. A planned tube path keeps the run efficient, keeps joints tight, and avoids attic conflicts while protecting the mirror-like interior surface that carries the daylight.
Finally, the interior finish should look intentional. The ceiling cutout needs to be round, stable, and clean with the diffuser sitting flat. Most units we install are completed in about two hours, and most installs don't require drywall repair. The goal is a quick & clean install with no mess left behind.
Tubular skylight installation details that prevent leaks
The roof penetration is the whole game. A tubular skylight can perform beautifully for years, but only if the roof assembly is treated with respect during installation. The steps below are the practical checkpoints we follow on New Port Richey installs to protect your roof and ceiling.
- Confirm the roof-side location from inside. We start in the room where you want daylight and confirm the ceiling spot makes sense, then verify attic access and clearance. This avoids placing the tube where trusses, ducts, or wiring force a bad route later.
- Lay out a tube path that keeps brightness up. Shorter, straighter runs deliver stronger daylight. When we do need offsets, we plan them so the reflective surface stays aligned and sealed at each connection.
- Cut the ceiling opening cleanly and set the diffuser frame. The interior opening is small compared to traditional skylights, which is why disruption stays low. The diffuser trim hides the cut edge, but the cut still needs to be accurate so everything sits flat.
- Cut the roof opening and install flashing to match the roof. The roof flashing isn't a "one-size-fits-all" part. We use dual flexible flashing systems designed to conform and seal correctly for the roof surface, so water is directed away from the opening instead of toward it.
- Seal, fasten, and weatherproof to the manufacturer's requirements. This includes correct fastener placement, proper sealant use where specified, and tight connections between components so water and humid air don't find a path into the attic.
- Assemble the reflective tube and protect the interior finish. Our solar tubes are 99% reflective silver-lined, so keeping the tube clean and the joints tight matters. We assemble and secure the tube so it won't shift over time.
- Final fit and cleanup. The diffuser is set, the room is cleaned up, and we confirm operation of any included light control features (like dimming) so you know what's installed and how it works.
If you're comparing installers, ask how they handle the roof integration step. A tubular skylight isn't forgiving of shortcuts at the flashing. A small drip can show up as a stained ring on the ceiling weeks later, long after the job "looked fine" on day one.
Choosing the right tube, lens, and light control for your room
Not every room needs the same setup. The right unit depends on the ceiling height, attic layout, how much daylight you want, and how you use the room during peak sun hours. We carry 50+ product combinations, which lets us fit the tube and diffuser to the space instead of forcing a single kit everywhere. Learn more about our residential skylights options to find what suits your home best.
Key decisions we walk through during your estimate:
- Room purpose and brightness expectations. A hallway and a kitchen behave differently. We'll talk about what "enough light" means for you and choose a configuration that matches that target.
- Tube routing constraints. Attic framing, HVAC runs, and wiring can dictate where the tube can realistically go. Planning for those obstacles up front protects brightness and keeps the install clean.
- Roof-side capture and water control. Lens placement and flashing selection have to match the roof surface and pitch. This is where the install either stays dry or becomes a recurring headache.
- Sunlight dimming capabilities. In rooms where you sometimes want less daylight, dimming gives you control without giving up the benefits of a tubular skylight the rest of the time.
A note about expectations: tubular skylights deliver daylight, not "heatless light." Any roof opening changes how a roof assembly behaves. The way we minimize heat gain and moisture issues is by using the correct components, keeping the tube sealed, and installing the roof flashing the way it's designed to shed water in New Port Richey weather.
Workmanship you can verify before we leave
Most homeowners can't see the roof flashing details from the ground or the tube joints once the diffuser is in. We make it easy to verify the important parts while we're still onsite.
- Ceiling finish sits flat. The diffuser trim should be snug to the ceiling with no wobble or gaps.
- No rattles or loose components. The tube and diffuser should feel stable. Movement now turns into noise later when wind hits the roof.
- Clean interior and no leftover debris. A quick & clean install includes protecting your room and leaving it tidy when we're done.
- Clear explanation of controls. If your unit includes dimming, you should know exactly how to use it before we pack up.
Our work is backed by a 10 Year Product Warranty and a 3 Year Install Warranty, and we provide free estimates. Tubular Skylight has been family-owned and operated since 1994, with project experience that includes demanding sites like NASA - Kennedy Space Center, Oak Ridge National Laboratory, and Fort McHenry, Birthplace of the National Anthem. That background shows up in the details: clean cuts, tight seals, and installs that don't create problems later. Visit our About Us page to learn more about our experience and commitment.
FAQs about tubular skylights in New Port Richey
How long does a tubular skylight install take?
Most units we install are completed in about two hours. The time comes from keeping the tube path efficient and using the correct flashing system for the roof, so the job doesn't drag into drywall repairs or repeated trips.
Will tubular skylight installation leave a mess or require drywall repair?
Most installs don't require drywall repair, and we aim for no mess left behind. The ceiling opening is compact, and the diffuser trim is designed to finish the edge cleanly when the cut is made accurately.
What's the biggest cause of leaks with solar tubes?
Bad flashing integration or shortcuts around sealing. The roof lens and flashing assembly has to match the roof surface and pitch, and it must be installed to direct water away from the opening under heavy rain and wind.
Can I control the light level once it's installed?
Yes. We offer sunlight dimming capabilities so you can reduce daylight when you want the room darker, without losing the benefits of a tubular skylight during the rest of the day.
How do you decide where to place the tube?
We choose a ceiling location that lights the room well, then confirm attic clearance and plan a tube route that avoids framing and mechanical obstacles while keeping the run efficient for better light output.
If you want brighter, more usable daylight inside without turning your roof into a problem spot, we'll walk the space with you and recommend a tubular skylight setup that fits your room and roof in New Port Richey. Request a free estimate through our Contact Us page, and we'll help you choose the right unit and install it cleanly, with warranty-backed workmanship.

