



Lakeland Tubular Skylight Installation
Lakeland gets strong sun for most of the year, and that light is wasted when hallways, closets, bathrooms, and interior kitchens stay dim all day. A tubular skylight captures daylight at the roof and delivers it through a reflective tube to a ceiling diffuser, brightening the middle of the home without turning the ceiling into a major construction project.
Our tubular skylight installation in Lakeland is built around two local realities: heat and sudden heavy rain. The right tube layout brings in clean daylight without adding glare, and the right flashing and sealing details keep the roof penetration watertight through Florida downpours.
Tubular Skylight is family-owned and operated, founded in 1994. We install solar tube systems with a 10 Year Product Warranty and a 3 Year Install Warranty, and we provide free estimates so you can choose placement and options with clear expectations.
What a tubular skylight does for Lakeland interiors
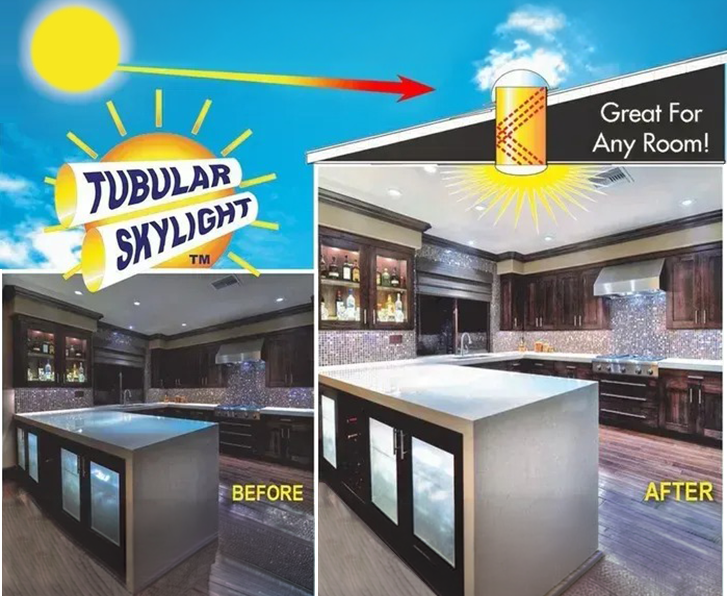
A tubular skylight is different from a traditional framed skylight. Instead of a large window cut into the roof, it uses a compact roof-mounted lens and a reflective tube to funnel daylight into rooms that don't have good access to windows.
In Lakeland homes, the biggest wins are usually in spaces that sit under attic area or between trusses: long corridors, laundry rooms, pantries, interior bathrooms, and walk-in closets. Once installed, the diffuser spreads light across the room, so you're not staring at a harsh beam. You get daytime visibility where you used to flip a switch, and because the roof opening is small, it's easier to integrate cleanly with the existing roof system.
This service is also about comfort. Good tube routing and a tight ceiling seal matter in humid weather. The goal is simple: bring daylight in, keep unwanted heat and moisture out, and leave the roof details cleaner than we found them.
Tubular skylight installation in Lakeland: layout, cut-in, and sealed flashing
Installing a tubular skylight isn't "cut a hole and drop in a tube." The light output, roof integrity, and leak resistance all come from the layout choices and the way the flashing is integrated with the roof.
- Room evaluation and target placement. We start inside, because the ceiling location determines how useful the light will be. We look for a spot that lights the working area, not just the center of an empty floor.
- Attic inspection and tube path. We confirm there's a workable run from ceiling to roof deck, and we plan around common obstacles like trusses, ducts, wiring, and plumbing vents. A straighter run usually delivers stronger light, but a smart offset can avoid structural members without sacrificing performance.
- Roof location and weather-facing details. On the roof, placement matters for water flow. We choose a spot that works with the roof's drainage path and avoids conflicts with vents and valleys.
- Precision cut-in and roof prep. The roof opening is cut to the correct size, then prepped so the flashing sits flat and sheds water correctly. This is where small errors create long-term problems, so we don't rush the fit.
- Flashing integration and sealing. The flashing system is installed as part of the roof surface, not as an afterthought. That means correct overlap with roofing materials so water is guided away from the penetration instead of toward it.
- Tubing, sealing, and diffuser finish. The reflective tube sections are connected, sealed, and secured, then the ceiling diffuser is installed for a clean finished look from inside the room.
- Final check and cleanup. We verify the fit, the seals, and the interior finish. Our installs are designed to be quick and clean. Most units are installed in about two hours, with no drywall repair and no mess left behind.
Because we do this work every day, we focus on details that homeowners can't easily see later: tight joints in the tube run, clean seals at the ceiling plane, and flashing that sits flat and drains right.
What we check before we cut: roof type, attic obstacles, and moisture control
A tubular skylight is small, but it still changes the roof envelope. Before any opening is made, we confirm the roof assembly and attic conditions support a clean install that stays watertight.
- Roof material and profile. Shingle and tile roofs need different handling at the penetration. The goal stays the same in each case: a stable base, proper overlap, and a flashing system that matches the roof's surface shape.
- Pitch and water flow. Roof slope affects how fast water moves around the skylight. We account for that so the flashing sheds water the way the roof was designed to.
- Trusses and framing limits. We work with the structure that's already there. If a straight run crosses framing, we route the tube correctly rather than forcing a risky structural change.
- Heat and humidity behavior. Lakeland's humidity makes air sealing more than a "nice to have." A clean ceiling seal helps control moist air movement into the attic space and supports consistent performance from the skylight system.
- Existing roof condition at the install point. Soft decking, brittle materials, or prior patching around the planned opening are red flags. If we see a condition that could compromise the skylight's seal, we address it in the plan before installation proceeds.
If you've had staining on a ceiling or you're replacing an older skylight that was prone to leaks, the fix is rarely the tube itself. It's almost always the roof integration. That's why our process puts flashing and water management at the center of the job.
Options that change the result: tube finish, dimming, diffusers, and flashing systems
Not every tubular skylight feels the same once it's installed. The right combination depends on the room, the roof-to-ceiling distance, and how you use the space during the day.
- High-reflectivity tubes for stronger light delivery. We use 99% reflective silver-lined solar tubes to move daylight efficiently from roof to ceiling, especially helpful when the tube run is longer or needs an offset around attic obstacles.
- Dimming capability. In spaces like bedrooms, nurseries, media rooms, or any room where you sometimes want less daylight, sunlight dimming capabilities let you control brightness without giving up the benefit of daytime natural light.
- Diffuser style and light spread. The diffuser is what you see from inside. The right diffuser choice affects how evenly the light spreads and how the finished ceiling looks once we're done.
- Flashing system selection. Roof penetrations live or die by the flashing. Our dual flexible flashing systems are selected and installed to match the roof's needs so water is directed away from the opening.
- Matching the build, not forcing a one-size setup. With 50+ product combinations available, we can set the unit up to fit the ceiling height, roof type, and how bright you want the space to feel.
The right options don't just improve the look. They reduce glare, support consistent light delivery, and help the skylight stay tight through years of sun and storms.
FAQ about tubular skylight installation
How long does tubular skylight installation take in Lakeland?
Most units are installed in about two hours. The exact time comes from the roof type and how direct the tube path is through the attic, but the work is designed to stay clean and controlled.
Will a tubular skylight leak during Florida rain?
A properly installed unit should not leak. Leak resistance comes from correct flashing integration with the roof surface and clean sealing at each connection point, not from extra caulk after the fact.
Does a tubular skylight make a room hotter?
A well-installed tubular skylight brings in daylight without turning the room into a "hot spot." The tube and diffuser system is meant to deliver light while limiting heat transfer, and tight sealing matters in Lakeland's heat and humidity.
Can you install a tubular skylight where there are attic obstructions?
Yes. We plan the tube route around common obstacles like trusses and ductwork. The key is mapping the path before the roof opening is made so the final run stays secure and efficient.
Free estimates make it easy to choose the right location and options for your home, then schedule an install that's focused on clean roof integration and a finished interior look. With Tubular Skylight, you're working with a family-owned company founded in 1994, backed by a 10 Year Product Warranty and a 3 Year Install Warranty.
If you're ready to replace daytime light switches with natural light, request an estimate and we'll recommend a tubular skylight layout that fits your roof, your attic space, and the way you use the room.

