



Arcadia Tubular Skylight Installation
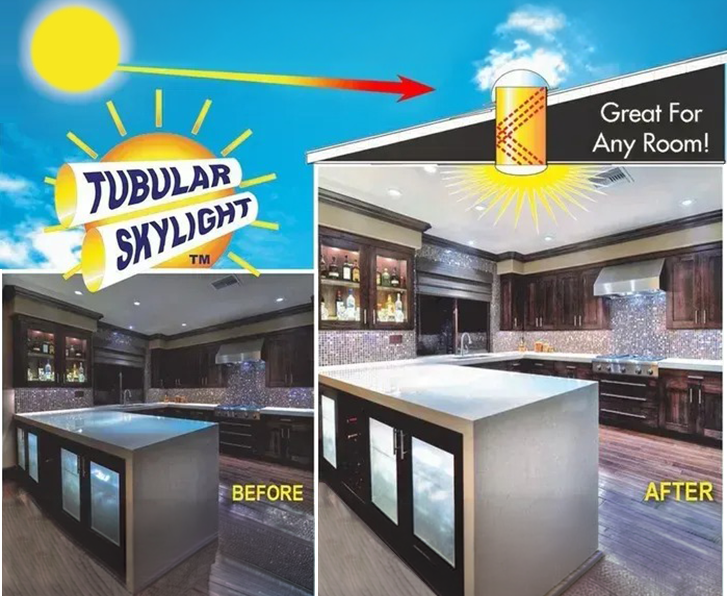
A typical tubular skylight installation in Arcadia starts with a quick conversation about the room that feels darkest, then an on-site look at your roof and attic path, and ends with natural daylight pouring through a ceiling diffuser the same day. The goal isn't "a skylight somewhere on the roof." It's targeted light where you actually live: a hallway that stays dim, a closet you keep a light on for, a laundry room, a bathroom, or a kitchen corner that never brightens up.
We handle tubular skylight installation right here in Arcadia with a process built for speed and cleanliness. Most units are installed in about two hours, and the work is designed to avoid drywall repair, avoid indoor mess, and leave you with a finished diffuser that looks like it belongs in the ceiling. You'll also get clear warranty coverage: a 10 Year Product Warranty and a 3 Year Install Warranty.
Tubular skylight installation steps for Arcadia homes
The best installs feel simple to the homeowner because the prep work is done before the first cut. Here's how we run a standard job in Arcadia, and why each step matters.
- Confirm the lighting goal and the ceiling location. We start inside. We look at the ceiling area you want to brighten and check for obvious conflicts like ceiling fans, recessed lights, or HVAC registers. Getting the interior placement right is what makes the light feel "natural," not random.
- Map the path from roof to ceiling. A tubular skylight isn't just the dome on the roof. The tube run is the system. From the attic, we plan a path that avoids structural members, wiring, and ductwork so the tube stays as straight and efficient as the framing allows.
- Cut and weatherproof the roof opening. The roof opening is sized for the system and then protected with flashing. This is the point where craftsmanship matters most: the flashing has to sit flat, shed water correctly, and integrate cleanly with the roof surface.
- Install the tube and seal the joints. We assemble the reflective tube run and seal connections so you don't get air leaks, rattles, or a tube that shifts over time. Our tubes are silver-lined and highly reflective (99% reflective), which is the whole reason a smaller roof opening can deliver useful daylight to a ceiling below.
- Finish with the ceiling diffuser. The diffuser spreads light evenly so you don't see a harsh "spotlight" effect. The finished look should be clean and flush, like a purpose-built fixture.
- Walk-through and cleanup. We confirm the diffuser fit, show you how any dimming feature works if your build includes it, and leave the space clean. "Quick & clean installs" only counts if you don't spend your evening vacuuming.
Choosing the right tube, diffuser, and dimming options
Tubular skylights aren't one-size-fits-all. The right configuration depends on the room, the tube length, the roof condition, and the kind of light you want at different times of day. We offer 50+ product combinations because the details change the outcome.
Reflective tube performance is the backbone of the system. The interior lining of the tube is what carries daylight from the roof to the ceiling. A highly reflective silver-lined tube keeps light loss low across the run, which matters when the target room sits farther from the roofline.
Diffusers control the "feel" of the light. Some rooms need broad, soft illumination (think hallways and living areas). Others need focused brightness without glare (common in closets, pantries, and laundry rooms). The diffuser style and placement affect how evenly the light spreads across the space.
Dimming gives you control. Daylight is great until you want less of it. If your space is used for resting, screens, or shift-based schedules, sunlight dimming capabilities let you reduce light without resorting to makeshift covers that look bad and don't seal well.
Flashing is selected to match the roof reality. The roof interface is where problems start when shortcuts are taken. We use dual flexible flashing systems designed to adapt to real-world roof conditions so the system sits correctly and stays weather-tight. The result you want is simple: a bright room and a roof penetration you never have to think about.
Placement and roof/attic constraints we plan for in Arcadia
In Arcadia, many tubular skylight installs are about bringing daylight into the center of the home, where windows can't reach. That usually means the tube run passes through an attic space with obstacles. Planning around those obstacles is how we keep installs clean and keep performance strong.
- Framing and trusses. We work with the structure as-is. The tube path is laid out to avoid cutting structural members, and the roof opening is placed accordingly. A small shift in placement can prevent a big structural problem.
- HVAC and ductwork. Ducts often occupy the exact bays you'd want for a straight run. We route around them with the goal of keeping the tube efficient and properly supported, not kinked or stressed.
- Electrical and ceiling layouts. Recessed cans, ceiling speakers, and wiring routes can limit placement. We confirm what's above the ceiling before we cut, so you don't end up relocating fixtures after the fact.
- Tube length and bends. The straighter the run, the more light you get at the diffuser. When the layout forces bends, we plan them intentionally and keep performance in mind so the finished result still feels like daylight, not a weak glow.
- Moisture and air sealing at the ceiling plane. Bathrooms, laundry rooms, and kitchens are common targets for tubular skylights, and those spaces put more demand on sealing details. We treat the ceiling connection as part of the system, not an afterthought.
If you're comparing options, ask any installer to explain how they decide the exact ceiling spot and the exact roof spot before they cut. A good answer sounds like planning. A bad answer sounds like guessing.
Clean install standards, warranties, and what "two hours" really means
Speed only helps you if the details are right. Our "most units installed in about two hours" approach comes from doing the same critical steps in the same order, with the right tools on hand, and without turning your home into a jobsite.
Here's what that looks like in practice:
- No "we'll patch it later" drywall approach. The system is installed so the ceiling finish is complete when we're done. That's why many installs don't require drywall repair.
- Work area control. Cutting is contained and cleanup is part of the job, not a favor. You should be able to use the room immediately.
- Clear warranty coverage. Your installation is backed by a 3 Year Install Warranty, and the product is backed by a 10 Year Product Warranty. You know what's covered and what to expect.
We've been doing this since 1994, and the work scales from homes to demanding facilities. Our project experience includes sites like NASA - Kennedy Space Center, Oak Ridge National Laboratory, and Fort McHenry, Birthplace of the National Anthem. That kind of work requires careful planning and consistent execution, which is the same mindset we bring to tubular skylight installation in Arcadia.
If you want an estimate that's based on your roof layout and your ceiling location, we offer free estimates. You'll get straightforward recommendations on placement and configuration, not a one-option pitch.
FAQ: Tubular skylight installation in Arcadia
How do you decide where the roof opening goes?
We start from the ceiling location you want to brighten, then trace a practical tube path through the attic. The roof opening lands where the tube can run cleanly without conflicts and where flashing can be installed correctly on the roof surface.
Will a tubular skylight make the room too bright?
It can if the unit and diffuser aren't matched to the room. That's why configuration matters, and why dimming options are useful in bedrooms, media spaces, or any room where you want daylight control.
What keeps it from leaking?
Proper flashing and proper integration at the roof opening. The roof connection is built to shed water, sit flat, and stay sealed. We use flexible flashing systems designed for real roof conditions, then finish the tube run so the system remains stable and tight.
Do tubular skylights work in rooms under attic space with obstacles?
Yes. Obstacles like ducts and wiring are common. The key is planning the tube path so bends are intentional and the run stays supported and well-sealed, which keeps light output strong and prevents rattles or air leaks.
How long does the installation take?
Most units are installed in about two hours. The exact duration depends on access and how complex the tube path is, but the work is designed to finish cleanly without dragging into a multi-day interior project.
If you're ready to bring real daylight into a dark interior space, we'll recommend a tubular skylight configuration that fits your ceiling location, roof layout, and how you use the room. Request a free estimate and we'll plan the placement, tube run, flashing approach, and any dimming feature up front so you know exactly what you're getting before installation day.
Request a free estimate for tubular skylight installation in Arcadia

