

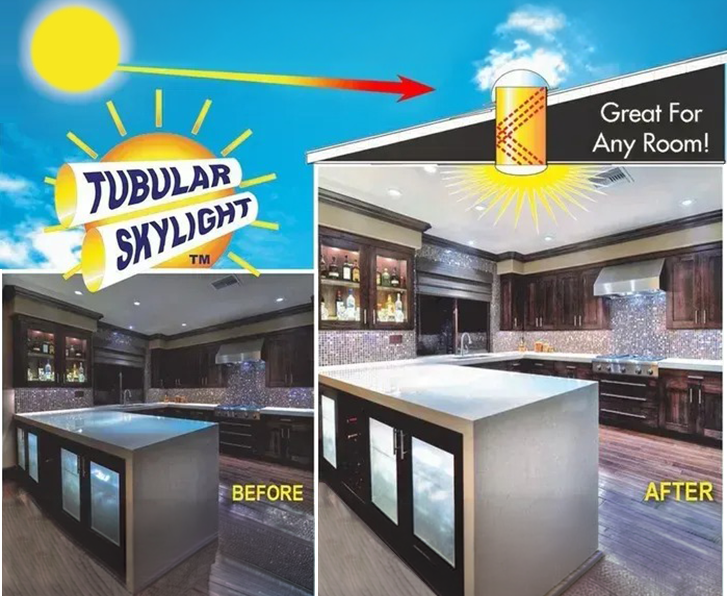


Estero Tubular Skylight Installation
A tubular skylight is only as good as the roof penetration that holds it. A cheap install can look fine on day one and still fail in Estero's driving rain because the flashing wasn't matched to the roof, the underlayment was cut wrong, or the tube path was forced around attic obstacles. Proper tubular skylight installation protects your roof first, then delivers clean daylight where regular skylights or new windows aren't practical.
Tubular Skylight is family-owned and operated, founded in 1994. We install tubular skylights in Estero with a focus on tight roof detailing, bright light output, and a clean finish inside. Most units are installed in about two hours with no drywall repair and no mess left behind. You also get a 10 Year Product Warranty and a 3 Year Install Warranty.
What a tubular skylight does in Estero homes
A tubular skylight (often called a sun tunnel or solar tube) captures daylight at the roof and sends it down a highly reflective tube to a ceiling diffuser. The goal isn't "a view" like a traditional skylight. It's steady natural light in spaces that stay dark even during sunny days.
In Estero, tubular skylights are a practical fit for homes that have long interior runs and rooms without exterior walls. They're also a smart choice when you want more daylight but don't want the larger opening, structural changes, or interior rework that come with many full skylight builds.
- Best-use rooms: interior bathrooms, closets, hallways, laundry rooms, pantries, and stair landings.
- Ceiling types we work with: flat ceilings with attic space above, and taller or vaulted areas where a shorter tube run makes sense.
- What you'll notice: the room turns "usable" earlier in the day without flipping a switch, and the light is soft and spread out instead of a harsh spotlight.
Tubular skylight installation in Estero: how the job is actually done
Good results come from planning the tube path and treating the roof opening like any other water-critical detail. Here's what our install typically includes, step by step.
- Room and ceiling layout check. We confirm the best ceiling location for the diffuser based on how you use the space, then verify what's above it: attic framing, ductwork, wiring, and bath fan runs. This prevents a "bright spot in the wrong place" and avoids last-minute reroutes that reduce brightness.
- Roof location selection. We choose a roof position that aligns with the tube path and supports proper flashing placement. The roof side matters because the capture point needs open sky exposure, not a spot blocked by nearby roof geometry or equipment.
- Cutting and setting the roof opening. We cut the opening cleanly, keep the surrounding roofing intact, and prep the deck for a watertight assembly. This is where cheap installs often go wrong by tearing shingles/tile edges or leaving uneven cuts that fight the flashing.
- Flashing integration and weather sealing. The flashing system is installed to match the roof type and pitch and to shed water the way the roof was designed to shed it. In Estero, that detail matters because rain loads can be intense and wind-driven.
- Tube build-out for maximum brightness. We assemble the reflective tube sections so the interior path stays as straight and smooth as the attic allows. Every unnecessary bend or gap costs light.
- Ceiling cut and diffuser install. We install the interior trim and diffuser so it sits flush and clean. Most installs don't require drywall repair, which is why homeowners like tubular skylights for quick upgrades with minimal disruption.
- Final water and fit check, then clean-up. We verify fasteners, seals, and alignment, then leave the area tidy. "Quick" only counts if the roof detail is correct and the interior looks finished.
Picking the right tube, diffuser, and light control
Not all tubes throw the same light. Product choices decide how bright the room feels, how evenly the light spreads, and how comfortable it is midday. We offer 50+ product combinations so the unit fits the room instead of forcing a one-size setup.
Our solar tubes are 99% reflective with a silver-lined interior, which helps daylight travel through the run with less loss. That matters most on longer tube paths or when attic routing requires an offset. If you've seen a dim sun tunnel before, the cause is often a low-reflectivity tube, too many bends, or a poor connection at the joints that leaks light into the attic instead of sending it to your room.
- Diffuser style: chosen for the type of space. A hallway usually benefits from broad spread, while a closet often needs more concentrated light over a smaller footprint.
- Dimming capabilities: useful for bedrooms, media rooms, or any space where you want daylight available but not always at full intensity.
- Tube routing decisions: the shortest path with the fewest turns is the brightest path. We plan around trusses, air handlers, and duct runs to keep performance high.
Roof integrity, flashing, and leak prevention for Estero conditions
The hardest part of tubular skylight installation isn't making a round hole. It's making a round hole that stays dry through seasons of heavy rain and wind. We use dual flexible flashing systems designed to conform and seal properly at the roof surface, because the flashing is what turns a skylight opening into a roof detail that behaves like it belongs there.
Water problems don't always show up as a drip on the ceiling. A small flashing error can send water into the roof assembly where it wets decking or insulation first. By the time staining appears inside, the repair is bigger than it needed to be. That's why our process treats the roof interface as the priority, not an afterthought. Learn more about our company history and approach.
- Warning signs you're replacing a poor install: ceiling staining near the diffuser, musty attic smell around the tube, bubbling paint, or a unit that fogs because the assembly isn't sealed correctly.
- Why roof type matters: the flashing has to match the roof system and pitch so water sheds naturally. "Close enough" flashing is how leaks start.
- Why alignment matters: if the dome, tube, and diffuser aren't seated squarely, seals get stressed, light output drops, and the interior trim looks off even if it's technically installed.
FAQ for tubular skylight installation
How long does tubular skylight installation take in Estero?
Most units are installed in about two hours. We keep the work tight and clean, and most installs don't need drywall repair.
Will a tubular skylight leak during heavy rain?
A properly installed unit shouldn't. Leak resistance comes from matching the flashing to the roof type and pitch, integrating it correctly, and sealing the assembly so water sheds the way the roof is designed to shed.
Does a longer tube mean the room will look dim?
Length and bends affect brightness. We use 99% reflective silver-lined solar tubes and plan the tube path to stay as straight and efficient as the attic layout allows, which helps keep light output strong.
Can you control the light if the room gets too bright?
Yes. We install units with sunlight dimming capabilities so you can dial daylight up or down instead of living with one fixed brightness level.
What warranty comes with the installation?
You receive a 10 Year Product Warranty and a 3 Year Install Warranty, so both the unit and the workmanship are covered. See our customer reviews to learn about their experiences.
If you want real daylight without a big remodel, tubular skylights are one of the cleanest upgrades you can make to a home in Estero. We'll look at the room you want to brighten, confirm the roof and attic path, and recommend a configuration that fits how you actually use the space.
Request a free estimate through our contact page. With experience dating back to 1994 and project work that includes NASA's Kennedy Space Center, Oak Ridge National Laboratory, and Fort McHenry, we bring a careful, roof-first approach to every tubular skylight installation.

