



Brandon Tubular Skylight Installation
Most calls we get for tubular skylight installation in Brandon start with the same frustration: the lights are on all day in a hallway, closet, laundry room, or interior bathroom, and it still feels dim. Sometimes it's a remodel that created a new dark spot. Sometimes it's a home office move where glare from a window isn't workable, but daylight from above would be perfect.
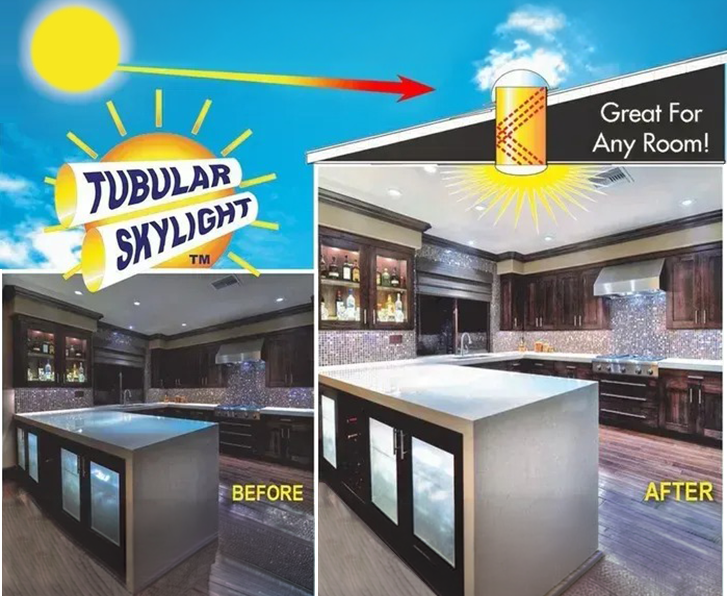
A tubular skylight (often called a solar tube) brings daylight through the roof and ceiling using a highly reflective tube and a sealed roof-mounted dome. Done right, it changes how a space feels without the heat gain, glare, or big interior work people worry about. Tubular Skylight is family-owned and operated, founded in 1994, and we install these systems right here in Brandon with a quick, clean approach. Most units are installed in about two hours, with no drywall repair and no mess left behind.
If you're trying to brighten a specific room without changing your roofline or cutting in a full skylight, a tubular unit is often the most practical path from "dark corner" to "usable space." Free estimates are available so you can plan placement and options with clear expectations before anything is cut.
What a tubular skylight changes inside a Brandon home
The payoff isn't "more light" in the abstract. It's the exact moment you stop flipping a switch for tasks that don't need electric light. With a properly sized tube, the daylight lands where you need it, not where a window happens to be. That's why tubular skylights are a strong fit for spaces that are boxed in by rooflines, neighboring rooms, or long corridors.
Because the system is sealed and the light path is reflective, you get bright, even illumination without an open shaft that turns into a heat chimney. That matters in Brandon, where sun exposure and sudden weather shifts put stress on anything that isn't flashed and sealed correctly. The tube also keeps the ceiling opening small and tidy, so the finished look stays clean.
Homeowners usually notice three practical changes right away:
- Daytime usability: the space becomes functional for grooming, folding, sorting, or walking through without "living under a bulb."
- Better comfort than a larger skylight in small rooms: you get daylight without turning a small room into a hot spot.
- Cleaner ceilings: a tubular diffuser blends into the ceiling plane instead of creating a large framed opening.
How tubular skylight installation is done on your roof
Good installs don't start with the roof cut. They start with placement. We look at the room below, attic access, roof structure, and the roof surface so the system can be routed with the shortest, cleanest run. A straighter run delivers better performance, but we also plan around real-world framing, ducts, and wiring.
From there, our work follows a tight sequence designed to protect your roof and your interior:
- Layout from inside and above: we confirm the ceiling opening lands where the light is actually useful and where the attic path is clear.
- Cut and frame the openings: the roof opening is sized to the unit; the ceiling opening is cut cleanly for the diffuser ring.
- Install flashing and the roof dome: this is the waterproofing core of the system. The goal is a roof penetration that sheds water the same way the surrounding roof does.
- Build the tube run: we assemble and seal the reflective tube sections. Our systems use 99% reflective silver-lined solar tubes so light transfer stays strong even when the run isn't perfectly short.
- Set the diffuser and finish: the interior diffuser is installed flush and secure. Most installs don't require drywall repair.
- Clean up and verify: we leave the work area clean, confirm everything is sealed, and make sure the diffuser sits properly with no rattles or gaps.
That "no mess" result doesn't happen by accident. Containing dust, protecting flooring, and controlling debris from the ceiling cut is part of the job, not a bonus. Our process is built to keep your home livable while the work is happening. Learn more about our residential skylights and installation standards.
Tube length, elbows, and placement: getting the light where you need it
Tubular skylights look simple from the ceiling, but performance depends on the path above it. Tube diameter, run length, and any direction changes all affect how the light spreads and how bright it feels at the diffuser.
In Brandon homes, attic routing is often the deciding factor. A straight shot is ideal. If framing or mechanicals force a turn, elbows can route around obstacles, but every bend changes the light path. This is why we plan placement around the ceiling location you want and the attic reality you have.
During your estimate, we'll talk through:
- Where the daylight should land: centered in the room isn't always best; task zones matter.
- How the diffuser will look from below: placement should feel intentional, not like "the only spot that fit."
- How the roof position affects output: nearby ridges, valleys, and roof planes influence where the dome can sit for the cleanest flashing and best exposure.
For customers who want more control, we also install sunlight dimming capabilities. That's useful when a space needs daylight sometimes and softer light at other times, like a nursery, media room, or a bedroom walkway.
Flashing, sealing, and water control for Brandon weather
The risk most homeowners worry about is simple: leaks. The way to prevent them is also simple, but it has to be done precisely. A tubular skylight is a roof penetration, so the flashing system must match your roof surface and shed water naturally. If water has a path to sit or back up, it will find a way in.
Our tubular systems use dual flexible flashing systems, which helps the flashing conform to the roof surface so it lays flat and seals correctly. The goal is a dome-and-flashing assembly that integrates with the roof, not one that relies on a heavy bead of sealant as the primary defense.
We pay close attention to details that make the difference during hard rain:
- Up-roof water path: the top edge of flashing must direct water around the penetration, not into it.
- Fastener placement: fasteners belong where the flashing design intends, so water isn't driven into a vulnerable point.
- Seal integrity at tube joints: the tube run is sealed so humid attic air and wind-driven moisture don't become interior problems over time.
If an existing skylight or old tube is being replaced, we don't treat it as a simple swap. We inspect the surrounding roof area for soft decking, prior patching, or flashing shortcuts that should be corrected before a new unit goes in. See our About Us page for more on our expertise.
Options and fit: matching the system to your room, not the other way around
Not every room needs the same setup. The right combination depends on ceiling height, surface reflectivity (dark paint absorbs light), and how you use the space. We offer 50+ product combinations, which lets us size and configure the system instead of forcing a one-style-fits-all kit.
Choices we'll walk through during the estimate include diffuser style, tube diameter, and dimming options. The point is to deliver the result you're picturing: a brighter work area, a safer passage, or a bathroom that feels clean and open without leaving the lights on all day.
After installation, your coverage is clear: a 10 Year Product Warranty and a 3 Year Install Warranty. That install warranty matters because even the best product depends on how the roof opening, flashing, and seals were done.
Customers also ask if we're "experienced enough for roof work." Alongside residential tubular skylight installs, our team has completed demanding work tied to sites like NASA - Kennedy Space Center, Oak Ridge National Laboratory, and Fort McHenry, Birthplace of the National Anthem. The same mindset applies on a Brandon home: protect the structure, seal it right, and leave the space clean. Check out our customer reviews for feedback on our quality and professionalism.
FAQ
Will tubular skylight installation require drywall repair inside my home?
Most installs do not. The ceiling opening is cut for the diffuser, the trim ring covers the edge, and the finished look is clean without patching. If we see a ceiling condition that could change that expectation, we'll explain it during the estimate before work starts.
How long does a typical install take in Brandon?
Most units are installed in about two hours. The exact duration depends on attic access, roof type, and how direct the tube run can be, but the process is designed to be quick and tidy.
Can you add dimming so the light isn't too bright at certain times?
Yes. We install sunlight dimming capabilities so you can tone down the daylight when you want a softer room, without giving up the benefits the rest of the day.
What keeps a tubular skylight from leaking during heavy rain?
Correct flashing integration is the main protection, followed by proper sealing at the tube and dome connections. We use dual flexible flashing systems and install them so water sheds around the opening, not toward it.
Do tubular skylights work if the tube has to turn around attic obstacles?
They do, as long as the tube path is planned and assembled correctly. A straighter run delivers more light, so we aim for the cleanest route available and use reflective components designed to keep light transfer strong.
If you want a brighter room without a major remodel, a tubular skylight is one of the cleanest upgrades you can make. Request a free estimate and we'll map the placement from room to roof, confirm the best tube path, and spell out the exact options that fit your space in Brandon.
Contact Us to schedule an estimate and get a clear plan for your tubular skylight installation, including placement, dimming options, and warranty coverage.

