

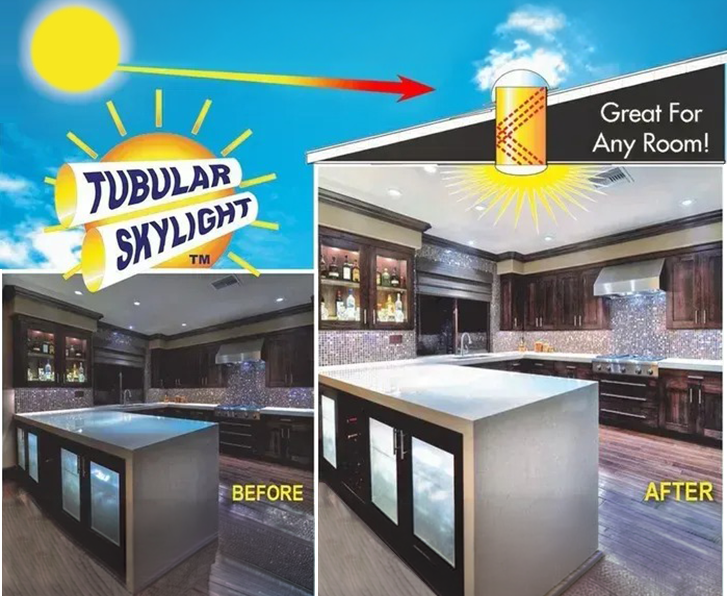


San Carlos Park Tubular Skylight Installation
A typical job starts with a quick conversation about the room you want to brighten, then a simple on-site look at the roof and ceiling locations, and a clear plan for where the tube will run. After you approve the layout, we protect the work area, cut and flash the roof opening, route the reflective tube through the attic space, and finish at the ceiling with a clean diffuser. Most units we install are completed in about two hours with no drywall repair and no mess left behind. That's what tubular skylight installation in San Carlos Park is supposed to feel like: fast daylight gain, tight waterproofing, and a finished ceiling that looks intentional.
Tubular Skylight is family-owned and operated, founded in 1994. We back the work with a 10 Year Product Warranty and a 3 Year Install Warranty, and we offer free estimates. If you've seen dark hallways, interior bathrooms, or closets that stay gloomy even at midday, a properly installed solar tube is one of the most direct ways to push natural light into those spaces without remodeling the whole roofline.
Tubular skylight installation in San Carlos Park: from layout to final seal
There are two parts to every tubular skylight: the roof-side daylight collector and the ceiling-side diffuser, connected by a highly reflective tube that carries sunlight through the attic. The details in between decide how bright it feels and how well it holds up through heavy rain and heat.
- Room placement and ceiling target. We start inside. The ceiling location matters more than people expect because it controls where the light "lands." Centering over a hallway run or placing it just forward of a vanity can make the light feel even instead of spotty.
- Attic path check. Next, we confirm the tube path above the ceiling. We look for framing members, HVAC ducts, plumbing vents, and wiring so the tube route stays clean and direct.
- Roof opening and flashing. We cut the roof opening, set the flashing system, and integrate it with the roof surface so water sheds the way it should. This is the make-or-break step for leak prevention.
- Tube build-out. We install the reflective tube sections and seal joints so light stays in the tube instead of bleeding into the attic. Our solar tubes use 99% reflective silver-lined tubing to keep brightness strong through the run.
- Ceiling finish and diffuser. We cut the ceiling opening and set the diffuser trim. The goal is a tight, finished look with a clean edge and no patchwork.
- Final water-check and cleanup. We re-check the roof-side seal, confirm the diffuser is seated correctly, and leave the area clean.
Because the tube diameter, tube type, and diffuser style change the result, we don't treat these as "one size fits all." Tubular Skylight offers 50+ product combinations, including sunlight dimming capabilities, so the system can match how the room is used rather than flooding every space with the same intensity.
Choosing the right tube, diameter, and dimming option
People usually start with one question: "How bright will it be?" Brightness depends on tube diameter, tube length, and how direct the path is from roof to ceiling. A shorter, straighter run will deliver more usable daylight than a long run with turns, even with high-reflectivity tubing.
- Tube type: rigid vs. flexible. Rigid tubes keep light output high because the interior surface stays smooth and direct. Flexible tubes help when the attic layout forces an offset route around obstacles. We choose the route that fits the structure while keeping the tube run as efficient as possible.
- Diameter and coverage. Larger diameters spread daylight across a bigger area and can make a room feel evenly lit, not just "bright in one spot." Smaller diameters work well where you want targeted light, like a narrow corridor or a tight closet.
- Diffuser behavior. The diffuser controls how the light looks from below. The right diffuser reduces harsh hotspots and gives you a softer, more room-like glow.
- Sunlight dimming capabilities. Some rooms need daylight, but not full strength all day. A dimming option matters in spaces like media rooms, nurseries, or anywhere you want control at certain times without giving up natural light completely.
The practical decision point is this: if you want the light to feel like it belongs in the room, the tube path and diffuser choice matter as much as the roof component. That's why we confirm the ceiling location first, then engineer the roof opening to support that interior result.
Roof details that prevent leaks in San Carlos Park weather
A tubular skylight should brighten your home, not introduce water risk. In San Carlos Park, the roof-side installation has to be built for intense sun, wind-driven rain, and fast-moving storms. The collector and flashing assembly must shed water predictably, even when rain hits at an angle.
We use dual flexible flashing systems designed to conform and seal cleanly at the roof interface. The goal is a stable, water-shedding transition where the skylight meets the roof surface, without relying on a sloppy bead of sealant as the "system." Sealant is part of the work, but flashing geometry does the real job.
During installation we pay close attention to:
- Roof pitch and water flow direction. The unit is oriented so water naturally runs away from the opening, not toward it.
- Underlayment integration. Proper layering and overlap matter. The flashing has to work with the roof assembly so water doesn't track underneath during heavy rain.
- Fastener placement and sealing. Holes belong where the system intends them to be, and every penetration must be sealed correctly.
- Attic moisture control. The tube and ceiling ring need a tight fit so humid attic air doesn't sneak into the conditioned space. This helps reduce condensation risk around the diffuser.
If you're replacing an older unit or dealing with a previous install that wasn't sealed right, we focus on correcting the roof interface first. A bright tube doesn't matter if the flashing was never integrated correctly.
What you should expect on install day
We keep the work controlled and tidy: protect the area under the ceiling opening, manage dust, and finish with a clean diffuser fit. "Quick & clean installs" is not a slogan to us; it's the difference between a simple upgrade and a week-long annoyance.
You'll also get warranty coverage that's easy to understand: a 10 Year Product Warranty and a 3 Year Install Warranty. If you're comparing installers, ask who owns the workmanship risk. Our install warranty makes that answer clear.
Our background includes demanding work environments, including projects for NASA - Kennedy Space Center, Oak Ridge National Laboratory, and Fort McHenry, Birthplace of the National Anthem. That kind of job history doesn't replace careful work in a home, but it does reflect a long track record of following details where failure isn't tolerated.
For homeowners who like social proof, Tubular Skylight is 5-star rated on Google Reviews. If you want to judge us the practical way, schedule a free estimate and ask us to walk you through your attic path, roof placement, and the specific product configuration we recommend for your room.
Tubular skylight installation FAQs
Will a tubular skylight require drywall repair?
Most units we install do not require drywall repair. The ceiling opening is cut to the diffuser size, the trim ring covers the edge, and the finish looks clean without patchwork.
Can you install a tubular skylight where there's attic equipment in the way?
Yes. We plan the tube route around common obstructions like ducts and framing, keeping the run efficient. If the straight path is blocked, we select the tube routing style that fits the structure while maintaining strong light delivery.
Do tubular skylights create heat gain?
They bring in daylight, not a direct shaft of hot air. The roof component and diffuser are designed as a closed system, so you get light without opening the home to outdoor heat or humidity.
What causes leaks around a tubular skylight?
Leaks almost always come from poor roof integration: incorrect flashing placement, bad overlap with roofing layers, or fasteners that weren't sealed correctly. A proper flashing system and correct installation prevent those failure points.
If you want brighter interior rooms without a major remodel, tubular skylight installation in San Carlos Park is a practical upgrade that changes how the house feels during the day. Request a free estimate, and we'll recommend a tube size, path, and dimming option that fit your roof and the way you use the room, then install it with clean interior finishing and careful roof-side waterproofing. See our customer reviews for real feedback on our service.
For a visual idea of what we can do, visit our gallery to explore installed projects and styles that might inspire your home upgrade.

