



Clearwater Tubular Skylight Installation
In Clearwater, a lot of the "darkest" rooms aren't missing windows by choice. Interior bathrooms, center hallways, walk-in closets, laundry rooms, and kitchens tucked under deep rooflines often rely on electric lights all day, even when the sun outside is bright. Tubular skylight installation fixes that problem by bringing real daylight through the roof and into the exact spot that needs it, without opening up a large skylight shaft.
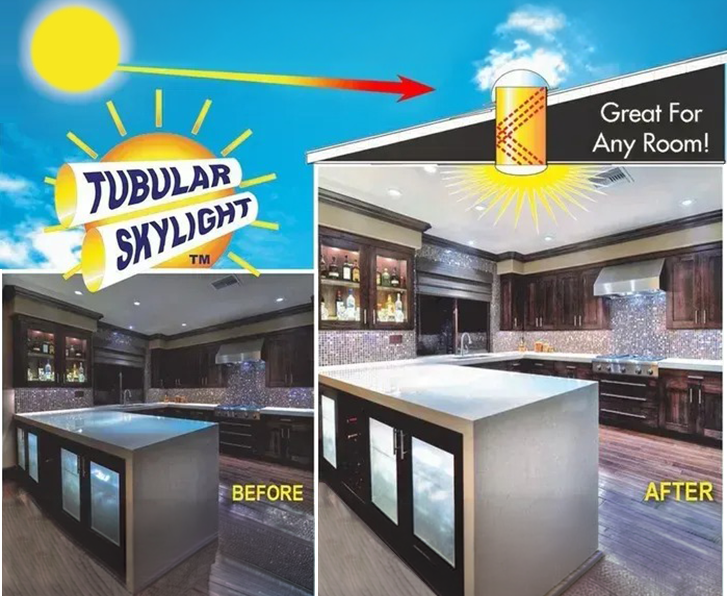
A tubular skylight (often called a solar tube) captures sunlight at the roof with a low-profile dome, sends it through a highly reflective tube, and spreads it at the ceiling with a diffuser that looks like a clean, flush light fixture. Tubular Skylight installs systems with 99% reflective silver-lined solar tubes, so the light you collect at the roof makes it to the room instead of getting lost in the run.
If you want daytime light where a traditional skylight would mean major framing changes or a long drywall chase, a tubular unit is usually the practical choice. It's also a smart pick in Clearwater when you want more daylight but still want to keep heat, humidity, and wind-driven rain risks under control with the right flashing and sealing details.
Tubular skylight installation options that matter on Clearwater roofs
Not every tubular skylight is the same once it hits a real roof. The right setup depends on the room, the attic path, and the roof material overhead. We look at the details that actually change performance and leak resistance, then match the unit to the home instead of forcing a one-size-fits-all approach. With 50+ product combinations available, we can dial in the right build for the space. See more about our residential skylights options.
- Tube path and bends: The straighter the run, the more light makes it through. When framing or HVAC forces an offset, we plan the bends to keep the tube efficient and the ceiling diffuser centered where it looks intentional.
- Room fit: A hallway needs different placement than a bathroom vanity zone or a closet aisle. We position the diffuser where the light is useful, not just where it's easiest to cut.
- Roof material and slope: Clearwater homes use a mix of roofing types, and the flashing approach must match the roof you have. Our installs use dual flexible flashing systems designed to conform and seal correctly instead of relying on heavy caulk as the "waterproofing plan."
- Light control: Some rooms need daylight but not full brightness all day. Sunlight dimming capabilities let you soften the output when the space calls for it, like a media room, nursery, or a bedroom that gets strong midday sun.
We also factor in the ceiling type and attic access. Most tubular skylight installs don't require drywall repair because the diffuser trim covers the ceiling cut cleanly. The goal is a finished look that reads like it always belonged there.
How a tubular skylight gets installed cleanly and correctly
A good install is equal parts layout, roof sealing, and interior finish. Done right, you get bright daytime light and a leak-resistant roof penetration that holds up through Clearwater's heavy rain and storm cycles. Our process is built for quick & clean installs, and most units are installed in about two hours with no drywall repair and no mess left behind.
- On-site evaluation and placement: We confirm the ceiling location from inside the room, then verify the attic path above it. We watch for framing members, ductwork, plumbing vents, and wiring so the tube run stays efficient and the diffuser lands where it looks centered and intentional.
- Protect the work area: Floors and nearby surfaces get covered, and we set up to keep drywall dust contained. Tubular skylight work is small-area work, so the job should feel controlled from start to finish.
- Ceiling opening and diffuser prep: We cut the ceiling opening to the correct diameter and prep the diffuser assembly so the interior finish sits flat and tight. The trim ring is what makes the final result look clean, so we don't rush this step.
- Roof opening and flashing integration: From the roof, we cut the opening in the correct location, then install the flashing system so it sheds water naturally with the roof. This step is where long-term leak prevention is won or lost.
- Install the dome and reflective tube: The rooftop dome is secured and sealed as designed, then the reflective tube sections are fitted and aligned. We keep joints tight and the interior reflective surface clean so you don't lose light output to gaps or contamination.
- Final assembly, dimming option setup, and cleanup: We install the diffuser, confirm proper fit, and set up any dimming components selected for the room. Before we leave, we clean the area so the only thing you notice is the new daylight.
Because this is a dedicated daylighting system, you're not taking on the disruption that comes with building a deep light shaft. The work is focused: one roof penetration, one ceiling opening, one finished diffuser.
Water management, storm exposure, and what keeps a solar tube from leaking
The biggest worry homeowners have about anything that penetrates a roof is water. That's a fair concern in Clearwater, where sudden downpours and wind-driven rain punish weak flashing details. Tubular skylights have a smaller footprint than large skylights, which helps, but the install still has to be done with the roof's drainage and sealing layers in mind.
Problems usually show up when an installer treats flashing like decoration and expects sealant to do the hard work. Sealant belongs in the right places, but it can't replace a flashing system that moves water away from the opening. We use dual flexible flashing systems to match the roof surface and to maintain a tight seal as the roof heats and cools. Learn more about our commercial skylights and their flashing technology.
- Correct placement on the roof plane: We position the unit so water sheds around it cleanly, instead of pushing runoff into a seam or valley condition.
- Flashing that matches the roof material: A detail that works on one roof type doesn't automatically work on another. We choose the flashing configuration to fit the roof you actually have.
- Clean tube assembly to reduce performance issues: Tubes that are scratched, dusty, or poorly joined lose light output and can create nuisance problems later. We keep the reflective path clean while we build it.
We back the work with a 10 Year Product Warranty and a 3 Year Install Warranty, because long-term performance matters more than a fast "in-and-out" job that leaves you watching the ceiling every time it rains. Tubular Skylight has been founded in 1994, and our project experience includes facilities where roof penetrations and weatherproofing have zero room for guesswork, including NASA - Kennedy Space Center, Oak Ridge National Laboratory, and Fort McHenry, Birthplace of the National Anthem.
If you ever compare estimates, ask one simple question: "How is the flashing system designed to shed wind-driven rain on my roof type?" The answer tells you a lot about how the install will hold up.
Common questions about tubular skylights in Clearwater
Will a tubular skylight make the room hotter?
A properly installed tubular skylight is designed to deliver daylight without turning the space into a greenhouse. The unit size, tube length, and diffuser style all affect the feel of the light in the room. We'll walk you through placement and options so the daylight is useful instead of harsh.
Can you install a tubular skylight in a room with an attic full of obstructions?
Yes, as long as there's a workable path from the roof to the ceiling location. We plan around trusses, ducts, and wiring and use the right configuration to keep the tube run efficient and the diffuser where it makes sense in the room.
How long does tubular skylight installation take?
Most units are installed in about two hours. The work is typically quick and clean, with no drywall repair and no mess left behind, because the diffuser trim finishes the ceiling opening.
Is there a way to dim the daylight?
Yes. We offer sunlight dimming capabilities so you can control brightness when you want softer light, like during screen time or in a bedroom.
What warranty coverage comes with the install?
Our installations include a 3 Year Install Warranty, and the products include a 10 Year Product Warranty. We'll explain what each covers during your estimate so you know exactly what's protected.
If you're ready to brighten a dark interior room without a big remodel, our Clearwater team will measure, plan the tube path, and recommend the right configuration for your roof and ceiling. Free estimates are available, and you'll get clear answers about placement, flashing, and light control before any cutting starts.
Tubular Skylight is family-owned and operated, satisfaction guaranteed, and 5-star rated on Google Reviews. Use our contact us page to request a free estimate for tubular skylight installation in Clearwater and get daylight where you actually live, not just where the windows are.

